The Lab – Gearcheck – Hak5 Bash Bunny – Ducky Mode

The Bash Bunny is a versatile USB tool.  It comes with several “Attack Modes” which actually are instructions to enable certain devices it should present to the “victim” machine.

The “Attack Modes” are SERIAL, ECM_ETHERNET, RNDIS_ETHERNET, STORAGE, and HID.  Today, we’re going to look specifically at the “HID” type.

Since the Bash Bunny expects a payload in order to perform its duties, we need to create a payload file.  This will be a file actually named “payload.txt” located in one of the switch directories under the payloads directory of the device.

In order to play with this, we’ll present two different payload files that do essentially the same thing, but will identify which switch folder the payload came from.  This will let us validate that the switch positions labeled by the documentation match the “switch” folder name on the device itself.

Our first payload will be located under the “switch1” folder, and our second under the “switch2” folder.  The payloads are below.

#Payload1 = switch1/payload.txt
ATTACKMODE HID
QUACK STRING I am on switch one!

#Payload2 = switch2/payload.txt
ATTACKMODE HID
QUACK STRING I am on switch two
!

After saving both of these, we can unplug the Bash Bunny, click the switch one notch (to the documented “switch2” position,) bring up a notepad or other scratch space typing field, and plug it back in.  We wait a few seconds for the Bunny to initialize/boot, and then we see “I am on switch two!” as we expect to see.

Unplug, click the switch one more notch (to the documented “switch1” position,) and do the same wait for boot, and finally we get “I am on switch one!” as we expected.

If we have a more elaborate DUCKY script we would like to use, we can put that into a file to itself, and change our “QUACK” command to call that file.

#Ducky Script1 = switch1/ducky_payload.txt
#Payload1 = switch1/payload.txt
ATTACKMODE HID
QUACK ducky_payload.txt

#Ducky Script2 = switch2/ducky_payload.txt
#Payload2 = switch2/payload.txt
ATTACKMODE HID
QUACK switch2/ducky_payload.txt

In the examples above, the first payload does not work, but the second payload, does.  This means the “switch#/<filename>” format is necessary in order to load that DUCKY script file.  These are things that need to be considered when working with the Bunny payloads.

These example payloads just mimic the USB Rubber Ducky at this point.  The LED wasn’t manipulated in these examples.  There is no feedback other than the keyboard, and we didn’t utilize any other devices.  The wait time to boot makes this a poor choice when speed is of the essence, so this definitely does not replace the USB Rubber Ducky for straight up HID attacks.  It does, however, provide the ability to produce more feedback (by way of blinking/solid/different colors on the LED) as well as the ability to carry two different payloads without having to “reload” the device by updating the “inject.bin” file in between.  It is easier to use, since the DUCKY script doesn’t have to be converted into an “inject.bin” to begin with.  Once we throw in some other Attack Modes, we’ll be able to do some more elaborate payloads to carry out our needs.

It also has some flexibility in that you can use  “QUACK STRING” followed by a “bash” variable, or a command, in order to see output from such.  You could use this functionality to use a network based attack mode to generate a “loot” file, then follow it up with a HID attack mode to pull up a text editor, and type the contents of the “loot” file for immediate display, if you so desired.

#Ducky Script2 = switch2/ducky_payload.txt
#Payload2 = switch2/payload.txt
ATTACKMODE HID
QUACK STRING $( ls /root/udisk )

One caveat with this is that using “QUACK” with any combination of “switch” followed by “.txt” (no matter what the characters are in between) causes it to NOT display that string.  It seems like a bug, since “QUACK STRING” shouldn’t care what comes after it, but “QUACK switch1/<filename.txt>” matters for loading from a file.  I think it should do a “QUACK STRING” check before it does any decision making on whether to try to load a file, and if it’s not “STRING” then consider the file name from there, but I haven’t looked at the code (if it’s available) to see if there’s an easy fix to offer.

Next week, we’ll look at the STORAGE Attack Mode.
Sudo Policy Fixes and Fails – The User Alias

We covered this on a very basic level last week, but today we’re going to focus on the User_Alias policy entries.

A sudo policy begins with a list of users and/or groups.  This list can be a raw listing, or it can be a label created by a “User_Alias” entry.  Organization of the policy file depends on your needs, but one common way to organize things is to use the aliases to define how pieces of a policy should look, then put all of the policies at the bottom where the alias labels are used to build out those policies.  There are other ways to structure this, as well, and we’ll cover several of them later.  For now, we’ll assume that we are doing one section of the file to cover all User_Alias entries, another section for all Cmnd_Alias entries, and so on.

A User_Alias entry is simply the key word “User_Alias” followed by the label name you would like to use, and equal sign “=” and the list of users and/or groups, comma separated, that the labeled alias will define.

User_Alias U_WEBADMINS = %webslingers

If you want to allow a group, but restrict one member of the group from having the access to the policy, you can modify it like so:

User_Alias U_WEBADMINS = %webslingers, !venom

Less useful in most situations, but still available as an option, is to use UID and GID numbers to represent the users and groups.  If the “webslingers” group has GID 404, and the “venom” user has a UID of 666, the same policy as above could be written this way, instead:

User_Alias U_WEBADMINS = %#404, !666

If you are using yellow pages with net groups, you can also reference a netgroup using a “+” instead of “%” to represent the group.

Finally, non-Unix group names and GIDs are represented with “%:” and “%:#” prefixes, instead of just “%” or “%#” per normal.

This is simple stuff, but I’ve seen poorly constructed “user alias” entries before.  This is why we’re taking it slow and hitting each type separately as we go.  A lot of this will seem redundant, but hopefully it lays it out in a simple and easily understood manner.

Thanks for reading!  Next week will be Host_Alias labels, simply because it is the next piece of the policy entry as read from left to right.

Fun-Day Friday – Book Review – Networking for Systems Administrators chapter 0

The lack of votes has been heard, tallied, and respected.  The winner is “book reviews” each Friday for a while.  I decided to do a chapter by chapter review, though I may include multiple chapters in any given review as we move along.

Our first book will be “Netowrking for Systems Administrators” by (surprise) Michael W. Lucas.

Since this book has a “Chapter 0,” we’ll just cover it, today.

This chapter is an introduction chapter, which addresses whom the book is for (systems administrators, DBAs, web administrators, developers, and other computing professionals.)  It also includes a note to network administrators to explain what will and will not be covered, since the size of the book is limited.

After the niceties are covered, he defines what he means by “server” versus “network device.”  The distinctions are important for the argumentative people that look for ways to nitpick.

Next, he covers a slew of basic network troubleshooting and analysis tools that are common across multiple operating systems to ensure that the reader can go ahead and get comfortable with looking for and trying out these tools if they aren’t already somewhat familiar with them.

Tools that range from basic “host,” “nslookup,” and “netstat” commands to advanced “tcpdump,” and “wireshark” commands are listed for the user to learn.

Finally, he does his best to give a very brief overview of how the remaining chapters break down.  There are two groups of chapters mentioned.  Chapters 1 through 6 cover technologies that systems administrators really should know.  Chapters 7 through 12 cover inspecting network information passively as well as actively probing the network for troubleshooting and analysis.

Lucas’ calculated humor is definitely present, and my initial take on the book (I’ve read the whole thing, just reviewing on chapter today) is that every IT professional should own a copy of this book.

Hacker-Tool Hump-Day – ps

I had less time to work with the new Bash Bunny than I anticipated.  I chewed on what to cover for today, but a team mate (my team lead) at work stumbled upon a new flag for “ps” that we either hadn’t seen before, or had forgotten completely existed, and it’s a pretty cool flag.

The “-T” flag takes a process ID (PID) and presents a “tree” view of it and all of its child processes similarly to how “htop” works.

Being able to see the children of a PID at a glance is nice when you’re trying to track down problems with complicated scripts that fork off lots of children.

To get the entire process view in tree format, just pass in PID 1.

ps -T 1

You can always pass the -o flag to narrow the view.  The example we came across used -o to show the PID, owner, and command.

ps -T 1 -o pid,user,command

This is also useful in an incident response situation to see if there are processes that are spinning off children that don’t make sense.  A long lasting “vi” session running a shell child would be very suspicious, for example.

I know this was short, but it’s a really nice tip to share, which was quick to write up with all the interruptions I’ve had today.

I really appreciate all of my readers.

I hope you’ve enjoyed!

Sudo Policy Fixes and Fails – The Basics of a Sudo Policy File

I tried to hold out on switching topics, but I’m going to switch to dealing with Sudo Policy for a while.  This SSH using GnuPG keys situation is taking longer than I ever intended, and I can’t keep posting “sorry for the delay” posts.  It isn’t right for me, and it isn’t right for you, my readers.  So today, I’m officially starting the Sudo Policy series.  My oldest daughter is getting a new laptop as a late graduation gift, and after she has transferred all of her files, I’ll be taking a drive dump of that laptop for archival purposes, then installing either OpenBSD (if it will work) or some flavor-of-the-month version of Linux on it.  I might install FreeBSD if OpenBSD doesn’t work, but we’ll have to wait and see how things shake out.

In the mean time, on to today’s topic!

The sudo command is nothing more than a policy engine.  This means it takes a requested input, compares it to a policy file that tells it what is and is not permitted, then either executes the input command on behalf of the calling user, or it does not.  This is as simple as it gets when describing the program itself.  In order to take advantage of this policy engine to allow some super user privilege level tasks to be granted to a set of non-privileged users, so that we (the sysadmins) don’t have to do their work for them, but also not give them the keys to the kingdom (root password,) we need to understand the policy file that sudo uses.

The master policy file for sudo is the /etc/sudoers file.  This file contains entries that tell sudo how to check that the requesting user is allowed to run the requested command as some other user on this system.  Let’s break that sentence down a bit and go over what that means, by looking at a policy entry.

%admin ALL=(ALL) ALL

The “requesting user” has a special label within the policy file, called the “User_Alias” label.  In this case, the “User_Alias” entry is a group called “admin.”  We know it is a group, because of the percent sign in front of the name.  This corresponds to a group name at a system level.

The “on this system” portion of the policy entry is next.  The first “ALL” you see, just before the equal sign indicates that this policy is valid for all hosts.  The special label for this is the “Host_Alias.”  For simplicity, this is often left as “ALL” on most systems.  However, this gives us the flexibility to deal with using one monolithic policy file on multiple systems without accidentally granting more than we mean to on any one given system.

The “as some other user” portion of the policy entry comes after the equal sign, and is surrounded by parenthesis.  This is another label that may contain a list of users, groups, or a mix of both.  Groups still need a percent sign to distinguish them from users.  The label for this is “Runas_Alias.”

The “requested command” is the last portion of the policy entry, and it  contains a list of commands to allow or deny, depending on whether you are white-listing the command, or black-listing it.  In all cases, assume that black-listing is not even an option.  I will explain why in a later post as we cover things more in depth.  The label for this is “Cmnd_Alias.”

There is one more thing do consider for a standard policy entry, and that’s the modifier TAG that can come before a Cmnd_Alias to change its behavior.  By default, sudo prompts the user for their password when calling it to execute a command, but if you put the NOPASSWD: tag in front, it doesn’t prompt.  This should technically be used sparingly, and we’ll cover what the pitfalls are with some of these tags as we go along.

Finally, understand that the default settings compiled into sudo may be overridden with a different kind of policy entry called the “Defaults” label.  There are ways to also modify any of the “*_Alias” labels with options from the “Defaults” list, but we won’t cover those until much later in this series.

So for now, the most basic way to look at a policy line is like this:

User_Alias Host_Alias=(Runas_Alias) TAG: Cmnd_Alias

We’ll cover each of these components more in depth each week, but know that as soon as I get the GnuPG/Yubikey/SSH situation finally stable, repeatable, and without bugs, I’ll be returning to the SSH Start to Finish Mastery series to finish it up before returning to this new series overall.

Thanks again for reading, and leave a comment if you enjoyed this content!

Fun-Day Friday – What to do with the Friday slot

Since I’m in the process of standing up a second site for my “non-tech” hobbies and activities, I’m thinking the Friday post should morph into something else.  I’m leaning toward a book review system where I review one chapter at a time from a book, or just review the entire book.  These would all be technical books on systems administration, programming, information security, etc.

Now is your chance to suggest something different.  If nobody drops a comment / suggestion before next Friday, I’ll probably start the new book review routine right away.

I’ll still post a reminder that I have “other content” pointing to the other site on semi-rare basis, but splitting the content into two sites makes sense to me.

Let me know what you think.  Do you support this direction?  Would you prefer some other type of content?  Are there any topics you’d like to see covered that haven’t been, besides “just finish the SSH series, already?”

Comment here, and I’ll review my strategy.

Thanks for reading!

The Lab – Gearcheck – Hak5 Bash Bunny

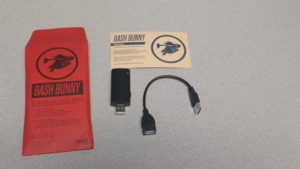
Anyone who has hung around this blog for a while should know by now that I’m a fan of the Hak5 gear.  The newest gadget gizmo of “gosh, did I do that” to be released is the Bash Bunny.  This is a USB device that offers more sophisticated attacks than the hard coded USB Rubber Ducky, but also acts as storage like the TwinDuck firmware, as well as behaving as a network device like the LAN Turtle.  You can choose multiple “attack modes” to define your payload, and bring home the loot.

bash-bunny

The Bunny is slightly larger (wider) than a typical USB thumb drive, and doesn’t look like a generic drive.  It also runs a full blown Debian Linux installation under the hood, so it takes a few seconds to boot.  And at twice the price of a USB rubber ducky (and then some,) it definitely doesn’t wedge the Ducky out completely.  The Ducky still works much faster upon plugin, and has that “I’m just a drive, you can TRUST me” look to it that the Bunny may never have.

The Bunny’s network capabilities are also are just a facade to allow for a few network type attacks against the victim computer.  In order for the Bunny to reach the internet, it has to trick the victim computer into letting it piggy back.  The LAN Turtle doesn’t rely on the “victim” host in order to do stuff on the rest of the network, so it also is not squeezed out of its niche.

Where the Bunny shines, though, is being able to coordinate multiple “attack modes” to gain trust as a HID or as a New Network, and then use combined “bunny script” and full blown Bash logic to determine what steps to take.  It suddenly provides flexibility in how to react to an initial command.

For example, you could have it do an “nmap” against the victim computer, then process the results to do multiple other attempts at gaining information/drop a shell/whatever based on the results.

How does this work?  There is a switch on the side that has three positions.  The one closest to the USB plug is switch 3 (“arming” mode,) which loads the Bunny as a storage device, so you can upload files to the payloads directories as needed.  The other two are “switch 1” and “switch 2” so that you can have more than one payload option at hand without having to re-arm between payload attempts.  If you built a “Windows” payload on “switch 1” and a “Linux” payload on “switch 2” you just set it to the appropriate switch before plugging in and exfiltrating … I mean “running an involuntary backup” on the data.

The LED is also multi-color, and you can program it to display the color as well as hold solid or blink based on where you’re at in your payload.  This gives you immediate visual feedback, and that makes it easy to tell what step you’re at when you suddenly find you need to snatch the device and leave because unexpected visitors just showed up while you were “helping their data along.”

In all seriousness, though, as a legitimate admin tool, this ranks above the Ducky as far as being able to drop customized long HID scripts onto a virtual machine console that doesn’t take “copy/paste.”  With the Ducky, you would have to code in pauses like little “sleep” statements, and just trust that the next step is going to be what you expect it to be.  With this, you have Bash to let you do some logic before deciding on what to do next.  It’s not the same as an old fashioned Expect script, but it gives some of the same power.

At least, in my head it does.  I haven’t really had any opportunity to play with it more than to make sure it works since I got it.  My dream is that I can code in some input detection so that something like the “hit caps lock 4 times” on my TwinDuck firmware could be used to trigger “the next step” of the payload without it just moving on on its own.  I’m going to do some payload testing and post the examples here in later Gearcheck posts.


No content today

Sorry for flaking out on this, again.  I did get to walk the almost 30 acre property on Saturday.  It rained a little while we were walking it.  It also got really cold.  And then Sunday, this thing I wasn’t prepared for happened.  Daylight savings time hit.  Between the walk, the cold, and the loss of an hour in my day, which has my internal clock all jacked up, I did not get anything done toward the Yubikey/GnuPG problem this weekend.  That’s all on me.

I did begin work on separating out the “non tech” stuff from the site a little, though.  I’ll have a site up for the Permaculture and non-tech hobby contents in a week or two, so those of you that are bothered by this won’t get so much of it, moving forward.

Wednesday will definitely have content, though.  I’ll cover the new Hak5 Bash Bunny, share some pics of the device, and talk a bit about configuration and usage.

Fun-Day Friday – On Permaculture and observation

Without going into too many details, my email subscribers got a note about the importance of “knowing your baselines.”  Another way to say this is, “observe your system.”  One of the pinnacle lessons of Permaculture is to observe before you design.  When you are doing a design for someone else, this is more difficult to do, but you can eek out how much the client has observed, and use that as a guide, in most cases.

Observation lets you pick out what looks like minor details that might significantly impact the system design as a whole, especially if overlooked.  For example, a “wet weather stream” may not be obvious unless it is actually raining.  There are signs that indicate that a seasonal stream may be present, but unless you witness the event, you may overlook it.  When you go to design your system, if you accidentally place a structure or earthwork in a manner that disrupts the stream, it may be disastrous in a heavy rainstorm during the Spring flood events.

This weekend, I have the privilege of walking a property for a Permaculture consultation client.  I know there is at least one stream on the property, as well as an established pond.  It is supposed to rain.  I’m hoping it’ll rain near the end of the walk, and that I can observe for a while to see how the water flows.  Water movement is one of the most important things to design to control, and the end goal is (usually) to keep every drop of water on the property as long as possible without disrupting the downstream neighbors.

I’m excited to do a design again, and looking forward to getting back to spending some time just enjoying nature for a bit.

I’m still going to focus on the GnuPG problem, though.  My hope is that I have a working solution by Monday.  We shall see.

The Lab – Status and Happenings

I don’t really have a Gear Check post to share today, but I did want to give a status update on some of The Lab projects.

The new Hak5 Bash Bunny is on schedule on time to be delivered by end of day today (Wednesday.)  I already have some payload ideas I want to try, but I need to get it in hand and see how it handles flipping between attack modes before I get too attached to any one idea.  I’ll definitely post about it as a Gear Check next week.

The Beaglebone Black Wireless is still bricked at this point, but I should find time to unbrick it before the weekend gets here.  Once I do, I’ll update the OS, then I’ll try compiling GnuPG2 by hand.  We’ll try the Yubikey 4 from it again if that’s successful.  If it isn’t, I’ll plan to update on a different machine.

In the non-tech side of the shop, I’ve been engaged for a Permaculture design by a friend of a friend, and I’ve also been asked to hold a class / workshop on an introduction to Permaculture for a local Community Group for the Spring.  This might slow down some of The Lab technical work, but the primary focus will still be Unix Security.

Friday will probably be a Permaculture related post, simply because I’m working on the design stuff and it’s on my mind.