Anyone who has hung around this blog for a while should know by now that I’m a fan of the Hak5 gear. The newest gadget gizmo of “gosh, did I do that” to be released is the Bash Bunny. This is a USB device that offers more sophisticated attacks than the hard coded USB Rubber Ducky, but also acts as storage like the TwinDuck firmware, as well as behaving as a network device like the LAN Turtle. You can choose multiple “attack modes” to define your payload, and bring home the loot.
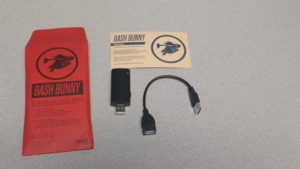
The Bunny is slightly larger (wider) than a typical USB thumb drive, and doesn’t look like a generic drive. It also runs a full blown Debian Linux installation under the hood, so it takes a few seconds to boot. And at twice the price of a USB rubber ducky (and then some,) it definitely doesn’t wedge the Ducky out completely. The Ducky still works much faster upon plugin, and has that “I’m just a drive, you can TRUST me” look to it that the Bunny may never have.
The Bunny’s network capabilities are also are just a facade to allow for a few network type attacks against the victim computer. In order for the Bunny to reach the internet, it has to trick the victim computer into letting it piggy back. The LAN Turtle doesn’t rely on the “victim” host in order to do stuff on the rest of the network, so it also is not squeezed out of its niche.
Where the Bunny shines, though, is being able to coordinate multiple “attack modes” to gain trust as a HID or as a New Network, and then use combined “bunny script” and full blown Bash logic to determine what steps to take. It suddenly provides flexibility in how to react to an initial command.
For example, you could have it do an “nmap” against the victim computer, then process the results to do multiple other attempts at gaining information/drop a shell/whatever based on the results.
How does this work? There is a switch on the side that has three positions. The one closest to the USB plug is switch 3 (“arming” mode,) which loads the Bunny as a storage device, so you can upload files to the payloads directories as needed. The other two are “switch 1” and “switch 2” so that you can have more than one payload option at hand without having to re-arm between payload attempts. If you built a “Windows” payload on “switch 1” and a “Linux” payload on “switch 2” you just set it to the appropriate switch before plugging in and exfiltrating … I mean “running an involuntary backup” on the data.
The LED is also multi-color, and you can program it to display the color as well as hold solid or blink based on where you’re at in your payload. This gives you immediate visual feedback, and that makes it easy to tell what step you’re at when you suddenly find you need to snatch the device and leave because unexpected visitors just showed up while you were “helping their data along.”
In all seriousness, though, as a legitimate admin tool, this ranks above the Ducky as far as being able to drop customized long HID scripts onto a virtual machine console that doesn’t take “copy/paste.” With the Ducky, you would have to code in pauses like little “sleep” statements, and just trust that the next step is going to be what you expect it to be. With this, you have Bash to let you do some logic before deciding on what to do next. It’s not the same as an old fashioned Expect script, but it gives some of the same power.
At least, in my head it does. I haven’t really had any opportunity to play with it more than to make sure it works since I got it. My dream is that I can code in some input detection so that something like the “hit caps lock 4 times” on my TwinDuck firmware could be used to trigger “the next step” of the payload without it just moving on on its own. I’m going to do some payload testing and post the examples here in later Gearcheck posts.