Pi-Top Kali – Getting Kali Installed

Over the last few weeks, I’ve gone through the process of installing Kali onto its own microSD card for use on the pi-top.  I started with the latest 2017 image, but recently the first 2018 image became available, so I did the procedure again.  This document will cover the latest image.

First, I downloaded the image from the site onto my Linux Mint laptop.  Next, I verified the checksum.

sha256sum ./kali-linux-2018.1-rpi3-nexmon.img.xz
1ce9fb1ab69c709046b3ddddfeff6481b484f19e8b2b61725cebfb6361953c08  ./kali-linux-2018.1-rpi3-nexmon.img.xz

This matched the checksum on the site.  After verification, I unpacked the xz archive with unxz.  This created the kali-linux-2018.1-rpi3-nexmon.img image file for installation.

unxz kali-linux-2018.1-rpi3-nexmon.img.xz

Next, I put a new 32G microSD card in to receive the image.  I checked dmesg output to verify that the card was recognized successfully.

[11115.585761] mmc0: new ultra high speed SDR50 SDHC card at address 0001
[11115.603234] mmcblk0: mmc0:0001 00000 29.8 GiB
[11115.606945]  mmcblk0: p1

In order to install, I unmounted the auto-mounted card and used dd to tranfer a copy of the image to the card.

sudo dd if=./kali-linux-2018.1-rpi3-nexmon.img of=/dev/mmcblk0 bs=512k
14000+0 records in
14000+0 records out
7340032000 bytes (7.3 GB, 6.8 GiB) copied, 388.375 s, 18.9 MB/s

I ejected and re-inserted the card to verify it is seen correctly.  Both partitions were picked up, and I unmounted these for the next step.  Because the image is much smaller than the size of the card, I needed to resize the linux partition to take advantage of the extra space.  I used GParted for this.

GParted has an issue with the e2fsck not being up to date enough.  I had to install the following two packages manually, before growing the EXT4 mount point:

sudo apt-get install ./e2fsprogs_1.43.8-1ubuntu1_amd64.deb ./e2fslibs_1.43.8-1ubuntu1_amd64.deb

Once GParted was working correctly, I used it to resize the linux partiton.

sudo gparted /dev/mmcblk0

I selected the EXT4 mount, chose “move/resize,” and resized it to take up all of the unallocated space.  I then applied the change, and closed the program.

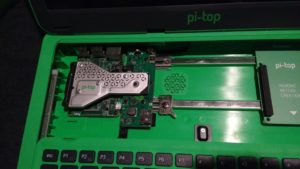
I swapped microSD cards to put Kali into the pi-top and remove polarisOS.  Booting the machine worked fine on first try, so the image appears to be installed okay.

I had a few housekeeping tasks to take care of.

My first housekeeping task was to create a new password for the root user.  Second was to regenerate host keys.  Most pre-built images should go through these two basic steps, since they ship with pre-generated widely known shared keys and passwords.

To regenerate the host keys, I ran:
root@kali:~ rm /etc/ssh/ssh_host_*
root@kali:~ dpkg-reconfigure openssh-server
root@kali:~ service ssh restart

I was surprised to find that the newest version of kali actually didn’t ship with pre-installed ssh host keys.  When I ran the rm command, it failed with file not found, and a file listing of /etc/ssh confirmed there were none to remove.  I only needed the dpkg-reconfigure and service restart.

My next steps included updating the system, since Kali-Rolling updates very frequently.  In order to do this, I put the machine on the network, then ran the following:

ntpdate 0.us.pool.ntp.org
apt-get update
apt-get upgrade

The reason for the ntpdate first is that the machine doesn’t come with a configured NTP service, and the clock on the Pi puts the machine several months behind the real world.  It thought it was December 14 rather than current date.  The other two commands updated the APT cache, and then updated the system to latest.

My final task was to go through the process of updating the repository lists to be able to install the “pt-*” packages from polarisOS, but I ran into a dependency error on one of the packages, which prevented that from working properly.  I’ll continue to troubleshoot this issue before I go into the deep details of setting it up, but the error I ran into was that the python3-pt-idletime package was dependent upon python3 (< 3.6) where 3.6.4 is the current version in Kali.

Pi-Top Kali – First Boot PolarisOS

Last week we talked about the kit, how it went together, and the fact that the first boot was to the pi-top polarisOS microSD card included with the kit.  Today, I’ll go over a quick rambling of notes on how the second “First Boot” (after it charged) went, and what I poked around looking for in this OS.  This post will not include screenshots, but I may try to get a few and do a follow up later in the week that is screenshot heavy.

It is a graphical boot that brings up a LightDM Panel (auto log-in.)  This initial Panel is the “pi-topDASHBOARD” and contains the following three sections:

  • Learn. Play. Create (includes "pi-topCODER" launch and "CEEDuniverse" play buttons)
  • Quick Launch (includes application icons for common/popular applications.)
  • Notes (a notepad that can be typed into.)

Along the top of the Panel is a status bar that includes indicators for whether the network is working, battery status, date/time, and a selector for Settings.

Selecting any app from the Quick Launch (or pressing the “Panel” keyboard button) will make this initial panel go away, and present the typical X11 style desktop.

Pressing the “Panel” keyboard button will bring the panel view back.

Since the Battery Status only shows on the Panel bar, this is a good thing to have.

From the typical X11 style desktop view, there are a few apps pinned to the bottom task bar.

  • Chromium
  • File Manager (PCManFM)
  • LXTerminal
  • CEED Universe
  • 3D Slash
  • Mathematica
  • Wolfram

The far right of the status bar includes status icons for the network, volume, and time, as well as an “eject” icon for external media, and a “panel” icon that can be clicked instead of hitting the Panel button on the keyboard.

The primary menu icon is in the lower left corner and the menu includes categories for:

Out of the packages listed above, htop is a “top” replacement that has some enhanced features, CEED Universe is part of the pi-top “CEED” learning software, with online games and such, and the rest are pretty self explanatory (integrated development environments, programming languages, some games, web and email, and an office suite.)

The items of greatest interest to me from poking around with the intent of setting up Kali as the primary OS for this machine are the hardware related packages.  I want a battery status indicator, as well as power/terminal launch/panel control buttons to function from the keyboard.  In order to take advantage of these things, I took a look at the software repository settings, and found this:

/etc/apt/sources.list:

deb http://mirrordirector.raspbian.org/raspbian/ jessie main contrib non-free rpi
# Uncomment line below then 'apt-get update' to enable 'apt-get source'
#deb-src http://archive.raspbian.org/raspbian/ jessie main contrib non-free rpi

/etc/apt/sources.list.d/pi-top.list:

deb http://apt.pi-top.com/raspbian/ jessie main

/etc/apt/sources.list.d/raspbian.list:

deb http://archive.raspberrypi.org/debian/ jessie main ui
# Uncomment line below then 'apt-get update' to enable 'apt-get source'
#deb-src http://archive.raspberrypi.org/debian/ jessie main ui

All of the packages specifically for the pi-top hardware include a “pt-” prefix.  Using a mix of dpkg -S, dpkg -L, and apt-cache showpkg I was able to confirm that the pt-* packages are located at the raspbian repositories jessie main.  This should make it easy to install them for Kali to take advantage of the special keyboard keys, and maybe get a battery status indicator.

Pi-Top Kali – The Kit

Last week was all about the order and tracking.  Today will cover the unboxing, how the kit goes together, and some potential “gotchas” to watch for while putting your own kit together, if you’re following along.

The large shipping box contained two boxes.  The larger box had the shell/kit, and the smaller box held the Raspberry Pi 3.

pi-top case
Pi-Top Case

I opened the larger box first, and verified that the contents were okay.  Inside were the shell, a box containing the charging cable + plug adapters, some booklets on the pi-top itself as well as the inventor’s kit, and of course, a box containing the components to the inventor’s kit that came with the purchase.  I don’t plan to do anything with the inventor’s kit for a while, so I left that alone.

The first step in putting the kit together was to slide the keyboard panel down, then remove the screw holding the heat sink/GPIO bridge in place.

GPIO bridge + heat sink

After that piece was removed, four screws were removed to take out the plastic card “stand in” for the Raspberry Pi 3.  This card has a little cushion on one side that helped protect the heat sink/GPIO bridge during shipping.  Once those were removed, I slid the hub to the right along its rail.

The next step was to unbox the Raspberry Pi 3 so that it could be installed.  What I did not do at first, but I recommend be done if you intend to use it at all, is to install the microSD card that came with a pre-installed pi-top polarisOS image.  Not installing the card before installing the Pi isn’t a deal breaker, but if you’re not going to swap cards, it’s less of a pain to do it now, rather than later.  If you do intend to swap cards, or you forget to install it before installing the Pi into the case, the little tool they include includes a groove for pulling/guiding the card into and out of the Pi.

To install the Pi, I had to line up the two USB prongs inside the case with the left most set of USB sockets on the Pi, then gently push up (toward the back of the case) to seat the board.  The next step was to put the screws back in to hold the Pi in place.  The holes in the Pi didn’t quite line up right with the holes for the screws, so a little effort may be needed in getting the Pi seated properly while installing these screws.

USB bridge
USB bridge
Pi Seated onto USB bridge

Once the screws were in place, I had to carefully slide the hub such that the audio plug and the HDMI plug slid into their respective sockets on the Pi.

Finally, I lined the heat sink/GPIO bridge up with the GPIO pins on the Pi, and carefully seated it until the pins on the other side seated into the smaller groove on the hub.  Once it was snugly in place, I installed the last (longest) screw to keep it seated.

Pi Installed
Pi Installed

With all of the components in play, and the microSD card installed, the last step was to slide the keyboard back into place and turn the machine on.  My first boot was to the pi-top polarisOS they included with the device, so that I could check that everything worked okay with their included software.

I noted that the battery indicator within polarisOS showed a 33% battery status, so I shut it back down and plugged it in.  It took a few hours to charge to full.  While charging the indicator light next to the USB ports on the back flashes.  When it is finished, it turns solid green.

Next week will cover the first boot, general poking around, and discovery of tools within polarisOS.