SSH Start to Finish Architecture – A Look at Standards Recommendations

Standing up a service, getting a handle on controlling key distributions, and configuring things to make life easier are all great, but there may be restrictions on what you can and can not do in your environment.  These are sometimes imposed by outside bodies, not just corporate policy.

For example, Payment Card Industry standards (PCI), National Institute of Standards and Technology Internal/Interagency Reports (NISTIR), and the various governance requirements from Sarbanes Oxley (SOX), ISO 27001, and so on all give broad guidelines for server hardening.  Some of them get less broad (more specific) such as the up and coming PCI DSS requirement to have multi-factor authentication.  Whatever your requirements, you should get intimate with the policies that define what you must, may, and must not do, whether they are internal corporate policies or broader reaching standards body policies such as listed above.

We’re going take a quick look at PCI DSS today, and briefly also mention NIST IR 7966 which deals with SSH Key Management.

Whether it is required in your environment or not, I recommend at least a good once over of the NIST IR 7966 document. Sections 4 and 5 are useful in helping to understand the magnitude of a poorly designed SSH deployment. For example:

Most importantly, SSH key-based trust relationships can enable an attacker who compromises one system to quickly move (or pivot) from one system to another and spread through an organization—individual trust relationships often collectively form webs of trust across an organization’s systems.

Imagine an attacker gains access to a little used server. A lazy systems administrator generated a public private key pair there, and sometimes uses it to bounce to other servers in the same subnet, but isn’t really supposed to do that. Now the attacker gains root, and rummages in home directories looking for anything juicy. SSH keys are definitely juicy. A quick perusal of known_hosts and attempt after attempt come up gold when testing this private key that was discovered. Because the admin didn’t lock down the public key at the end points, the private key would work from anywhere. The attacker makes a copy for himself, and goes about his business.

Attackers tend to think in “graphs.” Defenders tend to deal with lists of assets. Yes, those are best organized as graphs, but most defenders don’t treat them that way. A “graph” is organized by a “source” asset, a vector (direction), and a “target” asset that can be affected by that source. Trust relationships are graphs by nature. “Tom” on “Workstation_A” can log into “Tom” on “Server_B.” But “Tom” on “Server_B” can’t log into “Tom” on “Workstation_A.” The trust is one way. Some trusts will be bidirectional. Mapping these trusts is how attackers are able to plant deep roots into a compromised network.

As for the PCI requirements mentioned before, a new requirement is coming that sets up a policy of required multi-factor authentication. In the Scoping and Segmentation guidance document, we can find an example of using a Jump Box for accessing the sensitive systems where we don’t want to apply multi-factor authentication directly to those systems.  That jump box is required to run its own firewall as part of hardening of the system.  This is called a “bastion host.”  The systems administrators are heavily restricted in how they can manage that host, per the rules laid out.  An excellent example of a company that is already doing a Jump Box work flow utilizing SSH Certificate Authorities that get generated via the work flow is brought to us by Facebook.

This article shows how they are using it to meet these PCI (or similar) requirements, but are still able to maintain a high level of efficiency in their daily administrative tasks.   Pay close attention, because they also talk about “zones” in their set up.  You may or may not want to try something similar if you need to stand one up for your company.

Another requirement from that same PCI document is for ONE of the authentication factors to be “something you have.”  It requires some kind of security token.  I’ve used several in my career.  Some are as simple as “my phone” using a one time pad software app.  Other have been as complex as a RADIUS token that kept a one time pad for each VPN login session.

Since I’ve been researching how to best incorporate tokens into an SSH deployment, I settled on making my first purchase for the lab a Yubikey 4.  It arrived in the mail over the weekend, and next Monday will cover how to get it working for ssh public key authentication.

I also want to take the time to thank 0ddn1x and TechRights for the recent pingbacks.  I meant to include a shout out last week, but I was up late, got frustrated with the recording situation, and frankly, forgot.

The new recording should be available this week.  (Probably Tuesday.)
Fun-Day Friday – ION (card and dice) Game

Today we’ll cover a game that is kind of odd, but lots of fun.  It’s both a card game, a dice game, and a dominoes game, without the dominoes: ION.

There is another card game by the same name from a different company.  That one focuses on building chemical compounds using ionic bonds.  It looks like a fun and educational game, but we don’t own that one, yet.  That will likely change, and a review will be forthcoming if it does.

This ION game contains cards that are printed with dots, much like dominoes.  A certain number of cards are dealt to each player at the beginning of the game, and a card is placed face up in the middle.  To play a card, the card being played must have the same dots as either half of the face up card.  For example, if the card on the table has 3 dots on top, and 5 on bottom, you would need a card with either 3 dots or 5 dots to play it.  This is where the similarity to dominoes ends.

There are also “Joker” and “Double Joker” cards, which act as a wildcard, and can be played at any time.  Some of the cards are “action” cards, and do different things depending on the icon.  They usually involve punishing other players by either making them draw, preventing them from playing on their next turn, or similar.  The objective is to be the first to get rid of all of your cards.

One of the action cards is called a “bomb” and should only be used in “tournament” play (where you are keeping score, not just playing to be the first to lose all cards.)  This one “explodes” a player kicking them out of the game.

One of the cards is a “challenge” card.  This one forces a roll of the yellow die.  There is a gamble involved where the person playing this card gets to pick 2 numbers, and the person being challenged gets to pick 1 out of the remaining numbers.  Rolling one of the chosen numbers results in drawing more cards.  You take turns rolling until one of you gets it.

Some of the cards actually have “punish” in the name, and those require the player being punished to roll the black die.  The number of dots on the roll determine how many cards to draw.

There is a “block” card that can block some things, but not others.  Usually this is determined by logic of who goes next, but the “gift” can’t be blocked simply “because it’s rude to decline a gift,” according to the rules.

A two player game removes all “punish previous player” and “tick tack” cards, and players are dealt 9 cards to start.  Games with three or more include all cards and players are dealt 7 cards to start.

If you like games similar to UNO, this will probably hold some appeal.  It can be fast paced, or in tournament mode, it can take a while to play.

The game hasn’t been on sale at this link since December, but in case it comes back, here’s the Amazon link.

The game website is here, in case it eventually has links to other product providers.

I hope everyone has enjoyed the game review series thus far.

Thanks for reading!


The Lab – Gear Check – The Proxmox Server

This week I’ll be brief.  No pictures to go with this, because the gear is hand me down desktop stuff, but I’ll share some resource links for the software.

One component of this lab is a virtual machine server that I use to spin up VMs for various things.  Mine is currently just an old Alienware desktop I got from my cousin when he was cleaning house a year or two ago.  It doesn’t have much, and the setup isn’t ideal, because it’s just one machine, not a cluster for high availability, but it works for a lab environment.

The host software I use is called “Proxmox” which is a debian based Linux distribution that borrows a kernel from RedHat land for some of the capabilities it offers.  It’s basically a pretty web based front end to KVM, built in.  The interface isn’t too far different from VMware’s VSphere interface, but that’s a simplified comparison, really.

A friend from my old place of employment introduced me to Proxmox, and while I was researching the software online, I came across a book on it.  If you already have a hypervisor available, great.  Use what you know.  However, if you’re looking for an easy to manage hypervisor, because workstation virtual environments like VirtualBox just aren’t cutting it any more, this is a good one to pick up.  I highly recommend it.  It does have a free version, and it will nag you about not having a subscription, but it’s a minor annoyance in my opinion.

The software can be found here.

The book I mentioned can be found here.

The second edition of that book (which I don’t own yet) is here.

SSH Start to Finish Architecture – Standing up the CA pt 2

Last week we covered most of the explanation and commands for standing up the SSH CA.  This week, we will cover the Key Revocation List (KRL) and how to inspect the generated certificates.  We’ll also include an asciinema demonstration of the process.  Let’s get started.

When you generate the certificate, one of the flags lets you create an window of validity for the certificate.  This is more than an expiration date, because it also includes the date that the certificate first becomes valid.  This is a great way to create certain user certificates, because you might only want to grant access for a user for four hours over the weekend, and you can issue the certificate during the work week, but it will only work when the begin date/time is reached, and cease working when the end date/time is reached.

Now let’s assume that you issue certificates for a duration of one year at a time for regular employees.  An employee is issued a certificate that becomes valid as of the first of February of the year, which means it would need to be re-issued by the next February.  If the employee changes job roles and no longer needs access to the same sets of servers, that certificate is now a problem.  They have access to systems they should not, and there is a need to revoke that access.  In order to do that, we are supposed to use a Key Revocation List.

The KRL is created by the USER CA in our example, and must be distributed to each host each update.  This distribution facility is much like managing authorized_keys files, which means it can be cumbersome.  It is at least management of just one file, but that’s still one file more than ideal.

From the sshd_config man page:

RevokedKeys
Specifies revoked public keys file, or none to not use one. Keys listed in this file will be refused for public key authentication. Note that if this file is not readable, then public key authentication will be refused for all users. Keys may be specified as a text file, listing one public key per line, or as an OpenSSH Key Revocation List (KRL) as generated by ssh-keygen(1). For more information on KRLs, see the KEY REVOCATION LISTS section in ssh-keygen(1).

Okay.  Now to check ssh-keygen man page:

ssh-keygen is able to manage OpenSSH format Key Revocation Lists (KRLs). These binary files specify keys or certificates to be revoked using a compact format, taking as little as one bit per certificate if they are being revoked by serial number.

serial: serial_number[serial_number]Revokes a certificate with the specified serial number. Serial numbers are 64-bit values, not including zero and may be expressed in decimal, hex or octal. If two serial numbers are specified separated by a hyphen, then the range of serial numbers including and between each is revoked. The CA key must have been specified on the ssh-keygen command line using the -s option.

Remember last week when we said  a serial number was needed for the KRL?  This is why.  The user generates their keys.  They send you their public key for signing.  You sign the key to generate the certificate, and ship them the certificate.  The correct thing to do at this point is to delete your copy of the public key AND the issued certificate.

Now that person had a breach to their workstation, and the key should not longer be trusted.  You can’t just let the certificate expire naturally.  This person had a highly privileged role, and you want to be SURE the authentication is fully revoked, but only for this one certificate that was issued.  You need to issue a KRL statement, but you don’t have a copy of the actual certificate or key to revoke.  In this case you need to revoke by serial number.

The serial number is supposed to be unique, so it is a good idea to create the serial number from a scheme.  You might consider something like “a UID number + some base range.”  If the user’s UID is 2352, and you settle on a base range of four digits, for example, the first serial would be 235320001.  This would get incremented each time a certificate is issued for that user.  Alternatively, log the serial number into a database for each certificate issued, so that it can be searched for quickly.  Whatever works best.

When it comes time to revoke all certificates a user may own (in the case of multiple valid certificates) you can also revoke by ID.

Remember, when generating the certificate, the “-z” flag is for the serial number, and the “-I” flag is for the identity.  When revoking a certificate, you will use the “-k” flag as shown below:

ssh-keygen -s <ca_key> -I <certificate_identity> -u -k
ssh-keygen -s <ca_key> -z <serial_number> -u -k

The reason we also provided the “-u” flag is that it updates the KRL rather than replacing it.  This means we don’t accidentally remove other revocations that should still be present.

What are some of the problems with this solution?

If we tell the server to use a KRL, the file must exist, or sshd will not start.  This means an empty file must be there if it is configured to point to a KRL file, but there are not keys to actually revoke.  If a systems administrator unfamiliar with this removes the file because it is empty, in an attempt to clean up zero length files on the system, it will break sshd on the next restart.

The KRL needs to be managed on a per end point server basis.  This is much like the problem of handling individual authorized_keys files per server.  The reason I specifically mentioned the serial number issue is to pinpoint a scenario where we are not revoking access for a specific user because they are no longer here, but to revoke ONE certificate for that user because of a breach.

There are several ways to deal with the KRL situation.  You could create a script that pulls the KRL from a single site and stick it in a cron job.  You could use an rsync process to push it out to multiple end points every time the file is updated.  Neither of these is ideal, but I do NOT recommend doing something that seems easy, but might cause nightmares in the wee hours of the morning one weekend for some unlucky oncall engineer.  Do NOT point the configuration to a network enabled file share.  If the share were to fall out, the file would no longer be there in the eyes of the sshd, and if nobody noticed, the next service restart (say, by a late night automated OS update) sshd would refuse to start.  You might consider having a network share, but use a script that regularly checks for file to be updated before copying it into place locally.  Whatever you choose, the solution isn’t going to be pretty.

One more note about KRLs.  You can test if a certificate or key is in a revocation list with the “-Q” flag to ssh-keygen.

ssh-keygen -Q -f <KRL_file> <key_or_certificate_file>

And this is a good time to transition to inspecting certificates.  In order to inspect a certificate, use the ssh-keygen “-L” flag.

ssh-keygen -L -f <key_or_certificate_file>

This is what an example file looks like:

$ ssh-keygen -Lf ./.ssh/id_rsa-cert.pub
./.ssh/id_rsa-cert.pub:
Type: ssh-rsa-cert-v01@openssh.com user certificate
Public key: RSA-CERT 04:29:a8:fd:55:04:db:8f:1e:0d:45:18:a7:8e:a7:a6
Signing CA: RSA 27:cc:19:a3:67:1b:5e:2e:6a:48:a9:25:25:6d:64:6c
Key ID: "root"
Serial: 1234
Valid: forever
Principals:
root
Critical Options: (none)
Extensions:
permit-X11-forwarding
permit-agent-forwarding
permit-port-forwarding
permit-pty
permit-user-rc

There was going to be an Asciinema recording.  I went through the whole sequence until it was time to log into the target server.  I generated a certificate from 2014 because the date/time of the beaglebone is off by that much, and now it’s past midnight.  I will re-do this work and upload at a later date after correcting the clock issue on the demonstration CA machine.

I apologize for the lack of a recording at this time.  Thanks for reading!

Fun-Day Friday – Settlers of Catan

This week we’ll cover a board game that is tons of fun to play, but takes a lot of time.  This is a good rainy day family fun day game, so if you’ve never heard of it, read on.

The Settlers of Catan game includes a board that is dynamic.  The pieces that make up the board can be put together like a puzzle, but they’re mixable so you can move where each little land plot can be placed.  The instructions include a recommended default layout for beginners, and it is highly recommended to follow it, since it gives a good balanced layout of lands around the board.

First you build the outer border (which is supposed to fit together the same way every time, with number tabs/slots that connect.)  Then you place hexagonal land pieces inside like a honey comb.  Once the whole board is laid out, you place numbered tokens on each land.

A “robber” piece goes on the desert land.

Each player picks a color and takes 5 settlements, 4 cities, and 15 roads.  Each player places two settlements and two roads on the board to start.  A settlement goes on the corner of one of the hexagonal shaped land pieces, and a road runs long the edge of the hexagonal land piece.  Each land that a settlement touches allows that settlement to potentially obtain whatever resource it can produce in a round.

A round begins by rolling the two six sided dice “for production.”  The roll applies to all players, not just the person rolling the dice.  Whatever number is rolled determines which lands may produce resources that round (based on those numbered tokens that got placed on each land.)  Any settlement on the corner of land that produces that round gets a resource card for the resource that particular land produces.  Rolling a 7 is special, and we’ll get to it in a bit.

After rolling for resources, the player that rolled the dice may trade resources.  There are two kinds of trade.  Domestic trade allows the player that rolled the dice to trade with the other players on negotiation terms.  The other kind of trade is maritime trade, and allows for “trading” resources without trading with other players.  The normal (and worst) maritime trade is a 4:1 ratio.  A player may turn in any 4 of one resource card in exchange for one other resource card.  If the player has a settlement on the outer edge of the island next to a harbor, the harbor allows for maritime trade, which has more favorable ratios.

Once trading is done, if any, the player that rolled the dice may build.  Building costs are dependent upon “building cost cards.”  Refer to the card and spend the appropriate number of resources to build a new settlement or road, or to upgrade a settlement to a city.  You can’t build a settlement on an unoccupied intersection if any of the adjacent intersections contains a settlement or a city.  This means you can’t ever have more than three settlements/cities on one hexagonal land piece.  You also have to build the new settlements along one of your existing roads.  You can also spend resources to obtain a “knight card” or a “victory point” card.

A special “longest road” and “largest army” card are set aside until someone earns them.  To earn the “longest road” card, you need to be the first to build a continuous road of at least 5 individual road pieces.  After that, it can be stolen by someone else if they build a road that is longer than yours.  The “largest army” card is earned by becoming the first player to earn three knight cards.  Anyone earning more knight cards than you will take it, later.  Each of these cards is worth two victory points for the holder of the card.

To put a damper on things, there is a robber in the desert.  Any time someone rolls a “seven” several things happen.  First everyone with seven or more cards must discard half of them (odd numbers rounded down, first.)  Next, the player that rolled the seven must move the robber to the number token of a terrain hex, or back to the desert if it’s already on a terrain hex that isn’t desert.  Finally, that player is allowed to steal one resource card from one player with a settlement next to that resource hex.

If a player plays a knight card on their turn, they move the robber as if a seven were rolled and attempt to steal a player resource card.  The player being robbed places his cards face down and the robbing player picks one at random.  If the robbed player has no cards, nothing is stolen.

The first player to reach ten victory points wins.  Points aren’t awarded each turn, they are counted based on what the player holds.

  • Settlement = 1 VP each
  • City = 2 VP each
  • Longest Road card = 2 VP
  • Largest Army card = 2VP
  • Victory Point card = 1VP

This game is complex, and play time can reach or exceed the time it would take to play a decent game of Monopoly (for comparison.)  It does help develop strategic thinking, though, and does so with an excess of fun.

I’m sorry this one ran a bit long, but it is what it is.  Thanks for reading!

The Game is available at Amazon, and probably other retail outlets.

The Lab – Gear Check – Hak5 Field Kit

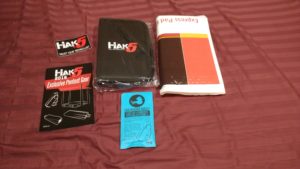
I’ve talked about individual pieces that are in the field kit before, including the USB Rubber Ducky, and the LAN Turtle.  The Field Kit has both of those, plus lots more.

Hak5 Field Kit 1
Hak5 Field Kit 1

We’ll start with the stylish zippered case.  It has the “Hak5 TRUST YOUR TECHNOLUST” logo on the front.  There is also a key ring tag that says “REMOVE BEFORE FLIGHT” on one side and “TRUST YOUR TECHNOLUST” on the other.  I have this attached to the zipper for every day carry use.

Inside are several elastic straps sewn into each side and on the spine.  These are positioned to hold various items neatly in place.

Hak5 Field Kit 2
Hak5 Field Kit 2

The kit includes a DVB-T+DAB+FM USB SDR radio receiver with magnetic mount antenna. I already owned two of these due to my HAM Radio hobby, so having an extra is nice.  This can be used in conjunction with GNU Radio (or other software) to receive and decode various signals and digital modes.

It includes a LAN Turtle and USB Rubber Ducky (with all Ducky accessories) which I also already had one of, so spares are nice.

There is a non turtle USB Ethernet Adapter, as well as a USB wireless adapter (with antenna.)  These help provide a little extra networking on the go, if needed.  They are especially useful in conjunction with a WiFi Pineapple (Nano or Tetra) which did not come with the kit I purchased, but is often an option that can be included.

There is also a USB multi meter for checking voltage/amp and other readings for a USB socket, as well as analyzing how much draw you are generating with your peripherals.  If you’re drawing too much, you’ll want to get a beefier power source for your gear, so it’s good to keep an eye on these things.

Finally, an assortment of cables and adapters for USB (including a micro USB to micro USB OTG cable, and self winding Ethernet cable) round out the mix.

I’ve added the battery pack from my WiFi Pineapple Nano to the kit, but the Nano itself stays in its own holster outside of the kit.  This way I don’t accidentally take it to work with me.

The kit normally cost around $170 when I bought it, but that kit is no longer available on the site, and I got it at discount when they ran the “Mr Robot” special for the USB Rubber Ducky cameo that aired on that show.

There are several kits available on the shop at this time, and this is the closest one to what I have, but it contains a lot more gear and is priced a bit higher because of it.  If you add up the cost of components bought separately, it’s still a good deal, and looks like it’s on sale today.  That may change in future.

Hak5 Elite Field Kit

It’s well worth the money if you can afford a kit and want some goodies for your lab.  If the link above is dead by the time you get to this, and I haven’t noticed and cleaned it up, here’s the link to their shop with all the various kits that should be available.

SSH Start to Finish Architecture – Standing up the CA

Before we get to the meat of the discussion, we need to set up some definitions.  Last week we mentioned that the Certificate Authority can produce certificates for both hosts and users.  We’re going to cover both today.  If it looks like we’re being repetitive, we’re really not.  Pay attention to which section you are in when following along, since flags will vary.

    Definitions:

  • Certificate Authority (CA) – The trusted third party that signs keys to produce certificates.
  • User Key – The user public key that will be signed by the CA to produce a user certificate.
  • Host Key – The host public key that will be signed by the CA to produce a host certificate.
  • User Certificate – The certificate generated by the CA from the user key provided.  This reduces the need for AuthorizedKeysFile or AuthorizedKeysCommand.
  • Host Certificate – The certificate generated by the CA from the host key provided.  This simplifies the known_hosts management, and makes this process more secure.
  • Principal – A means of restricting validity of the certificate to a specific set of user/host names. By default, generated certificates are valid for all users or hosts.
  • Trust – In order for a CA issued certificate to work, the server needs to be told to trust the CA before it will accept user certificates, and the client needs to be told to trust the CA before it will accept host certificates.
  • Key Revocation List – A means of revoking keys and certificates when they are no longer valid.
  • Validity Lifetime – A means of restricting the lifetime of a certificate’s validity.  If a certificate becomes invalid after a limited time frame, it will need to be re-issued with a new validity lifetime.  This allows for automatic revocation of certificates in case managing the Key Revocation List overlooks an intended removal.
  • Additional Limitations – Further restrictions can be applied to the certificates along the same lines as the public key prefix options discussed in a previous blog post.

The first thing we need to do after standing up and hardening the machine where the CA will live is add the unprivileged user that will be used for signing keys to issue certificates.

sudo groupadd -g 3000 sshca
useradd -m -u 3000 -g sshca -G sshca -c "SSH Certificate Authority Signing User" -s /bin/bash -d /home/sshca sshca

Now we need to build out the directory structure.

sudo -i -u sshca
mkdir -p {hostca,userca}

Next, we need to create the key what will be used for issuing HOST certificates.

cd hostca
ssh-keygen -t rsa -b 4096 -f host_ca -C "Host Certificate Signing Key"

We also need to create the key that will be used for issuing USER certificates.

cd ../userca
ssh-keygen -t rsa -b 4096 -f user_ca -C "User Certificate Signing Key"

At this point, there are two files in each directory. The private key file will have no extension, and the public key file will have the “.pub” extension. All certificates will be signed using the private key file, but we also need that public key file, so don’t discard it.

In order to create the TRUST needed for a server to recognize USER CERTIFICATES signed by our CA, we need to push that USER CA public key to each host, and set a configuration option.  You can place it anywhere, but I recommend making a subdirectory under the /etc/ssh directory to store these keys.

sudo mkdir -p /etc/ssh/sshca

Then copy the pub file over from the CA and stick it in this directory. Edit the /etc/ssh/sshd_config file to include this directive:

TrustedUserCAKeys /etc/ssh/sshca/user_ca.pub

Restart sshd (or force it to reload its configuration file) and this trust should now be created.

In order to take advantage of this trust, the user’s logging into the server need their public key to be signed by the USER CA.  This issues a certificate that will need to be given back to the user.

The syntax for signing a key looks like this:

ssh-keygen -s <ca_key> -I <certificate_identity> [-h] -n <principals> -O <options> -V <validity_interval> -z <serial_number> <public_key_to_be_signed>

The “ca_key” is the private key for the USER CA when signing user public keys, or the private key for the HOST CA when signing host public keys.

The “certificate_identity” is a “key identifier” that is logged by the server when the certificate is used for authentication. It is a good idea to use a unique identifier for this that is recognizable by your organization, since you can set up trust for multiple CAs.  For our example, the certificate_identity will be “unixseclab.”

If this is a HOST KEY being signed, ensure that you include the “-h” flag.

The “principals” are a list of users that can be authenticated with this USER CERTIFICATE.  Alternatively, it is a list of hosts that can be authenticated with this HOST CERTIFICATE.  Multiple principals may be allowed, separated by commas.  It is highly recommended that you actually set the principal to the username of the user or hostname of the server it is being issued for.  Blanket authentication can create forensic issues.

The “options” are a list of restrictions that can be applied.  These are like the prefixes we mentioned before.  Be aware that the newest versions of OpenSSH have changed one behavior regarding forced commands. Also note, that “options” are only valid for USER CERTIFICATES.  You would leave off the “-O <options>” when issuing HOST CERTIFICATES.

From Undeadly:

As of OpenSSH 7.4, when a forced-command appears in both a certificate and an authorized keys / principals “command=” restriction, sshd will now refuse to accept the certificate unless they are identical.  The previous (documented) behavior of having the certificate forced-command override the other could be a bit confusing and error-prone.

The “validity_interval” is used to set not only the expiration date of the issued certificate, but to also set a beginning date in case it should only become valid in the future.

Finally, the “serial_number” is an arbitrary number that can be assigned to make KEY REVOCATION easier.

The HOST CERTIFICATE that gets issued should go in the same directory as the HOST KEYS.  The sshd_config file needs to be modified to include a new “HostCertificate” for each new HOST CERTIFICATE issued.  The HOST KEY must also still exist, and must have its own “HostKey” entry in the sshd_config file.  Don’t remove them in exchange for the certificate entries.

HostKey /etc/ssh/ssh_host_rsa_key
HostKey /etc/ssh/ssh_host_ecdsa_key
HostCertificate /etc/ssh/ssh_host_rsa_key-cert.pub
HostCertificate /etc/ssh//etc/ssh/ssh_host_ecdsa_key-cert.pub

When the server has been configured to offer a HOST CERTIFICATE, the client side needs to also be configured to TRUST the CA that signed it.  To do this, we need to add the following entry to the user’s “known_hosts” file:

@cert-authority *.example.com <public key of the HOST CA that signed the host keys>

It may be necessary to remove existing host key entries in the known_hosts file for this host if it was recently migrated to use certificates.  A clean way to handle this is to make a back up copy of your known_hosts, zero the file out, and add only the certificate lines (by hand.)  Then any time you run into a non-certificate host, you can compare the offered key to your known good key in your backup copy, and accept if it’s good for the hosts that don’t use certificates, yet.

This is a good stopping spot for today’s post.  It ran longer than I expected, so next week we’ll cover Key Revocation Lists, Certificate Inspection, and run the actual example of generating our initial CA, signing a host key, and signing a user key, then using them to allow a client to connect to a server.  I wanted to include that recording this week, but I didn’t realize how long this post was going to get before I planned that out.

Thanks for reading, and a quick “thank you/shout out” to the folks at the CRON.WEEKLY newsletter for the pingback on last week’s article in this series for their issue #63!

Fun-Day Friday – Mastermind Game

I originally planned to cover Settlers of Catan this week, but we didn’t get to play last weekend, so I’m saving it for a later post.  Instead, we’re going to cover Mastermind, which is a very fun logic game.

Mastermind
Mastermind

The game plays similarly to Battleship in that there is a “blind” to keep the “guessing” player from seeing the other player’s code, and pegs are used to indicate a guess, and to mark a success or failure.

One player sets a code, flips the blind up so that the other player can’t see the code, then the other player is allowed to see the board.  There are 6 different colored large pegs, as well as black and white smaller pegs.  The colors are red, blue, green, yellow, white, and black.

The board ten rows across the board that contain four small peg holes at each end of the row, as well as four total large peg holes across the middle of the row.  The player doing the guessing has to pick colored pegs to place in the larger peg holes, to indicate that they guess that’s what the code is behind the blind.

The person that set the code then compares the guess against the code and places a white peg for each guessed peg that is a correct color, but in an incorrect location, and a black peg for each guessed peg that is both a correct color and in a correct location into the four smaller peg holes on one side of the row.  Once these pegs have been placed, if any, it is the other player’s turn to make a new guess.

If the code is correct, the code maker can flip the blind up to indicate a win.

The other side of the board can be used to mark how many wins each player has had.  This makes it possible to extend a “game” by playing multiple matches until one player or the other wins an agreed upon number of matches.  It also makes it possible to extend the number of guesses before saying a player “loses” by marking one of these for a full ten rows of guesses before clearing the board to try again (which would also make the game harder, since you lose the history of attempts, doing that.)

Finally, some people raise the difficulty by allowing there to be missing pegs.

Matches are usually fast paced, so this game can take as little as a few minutes to as long as several hours, depending on house rules and how many matches constitute a full “game.”

Mastermind is fun, addictive, and very good at teaching logic for younger players.  It is highly recommended.

The Lab – Gear Check – The Raspberry Pi

Today, we’ll take a look at the Raspberry Pi.  The Raspberry Pi is currently at “Pi 3” but our lab has a Pi 2 model B, which is what we will cover.

Raspberry Pi 2
Raspberry Pi 2

The original plan for the Pi was to create a very small and portable attack device, using Kali linux as the OS installation.  I mused over what to do about a screen, when I came across another blog post that covered how to set this up with one of the little screens sold by AdaFruit.

Re4son’s blog post gave some initial instructions that I tried to follow, but they didn’t work for me at first.  I bought the smaller 2.8″ screen on accident, and the menu size didn’t match.  I tried mucking with those settings, but there were SO many menus that needed adjusting, that it just wasn’t worth my time.  I bought the bigger 3.5″ screen and tried again.  I had a little more success, but the last time I rolled with this, I had issues with the Greenbone setup for Open-VAS.  I think it was probably an issue with the version of Kali I was at at the time.  I shelved this project, and haven’t picked it back up.  I will probably give it a go again, because his blog post has evolved even more since I last followed it.

Now that I have the Nexus 10 with Nethunter on it, this specific project will be a lower priority for a while, though.  My use for this until then will focus on using this as one of the target machines, either for configuration management examples, or as an actual vulnerable machine (with configuration issues being the primary vulnerabilities.)

The Pi 2 has a quad core 900Mhz ARM Cortex-7 processor from Broadcom.  It includes 1 Gig of RAM, 4 USB 2.0 connectors, an HDMI port, and a 10/100 RJ45 Ethernet socket.

All of the extra USB ports means that this can take several peripherals, including wireless adapter and keyboard.  The Pi 3 includes a built in wireless adapter, but the Pi 2 does not.  If you are getting a Pi for your lab, it is probably best to pick up whatever the latest model is, ignoring my setup.  The Pi 3 came out a few weeks after my last attempt at the Re4son project.  The frustration over the poor timing of its release, after dropping money on all new case, screen, and so on is one reason I haven’t touched it in a while.

Once again, if you want to follow along in building a lab similar to mine, here are the components.

The Pi 2 Board I recommend getting whatever is newest, though.

USB to TTL Serial Cable – Debug / Console Cable for Raspberry Pi Just like with the BeagleBone Black, you will probably want to be able to hit the “console” sometimes. This cable is needed for that. Note that the voltage on this is different from the one for the BeagleBone Black. Don’t use the wrong cable with either board.

The Case This case is really nice even when not used with one of the screens. It’s fairly sturdy, and fits around the components snugly. If you are not getting a display, there are other cases that are just as nice, and don’t cost as much. Shop around.

The 3.5″ TFT Display Unless you are planning on doing a specific project that includes such a tiny screen, I recommend holding out for a larger one, instead.  Something like this might be better, but it’s pricey.

Samsung EVO 32GB Class 10 Micro SDHC Card These came on sale for ridiculously low prices a few times, so we got them in sets of three or more. Class 10 cards are highly recommended for use with these small Single Board Computing devices.

SSH Start to Finish – Certificate Authority Basics

The way the OpenSSH Certificate Authority works depends on a few components.  First, there needs to be one trusted signing authority.  This can be any system, and it does NOT have to actively be connected to the network for the client/server handshake to take place using the CA signed keys.  There should also be a Key Revocation List, as well as a means for keeping the KRL updated.  A proper Identity and Access Management (IAM) platform could possibly handle this.  A close second would be a proper Configuration Management / Server Automation tool such as Puppet, Chef, Salt, or Ansible.  We will not cover using either of these tools in this series, but we will (most likely) cover an alternative solution when neither of the prior recommendations is available.  That’s for another day, though.  Today, we’re only going to introduce the basic concepts and fundamentals of how the OpenSSH Certificate Authority works.

Let’s set up the players.  There is a person (User_A) that needs to log into a target machine (Server_A) as himself.  He is coming from his laptop (Workstation_A.)  Normally, User_A would generate his key pair, log into Server_A as himself, and place the public key into the authorized_keys file in his home directory.  Instead, we’re going to pull in a new player that acts as a trusted third party.  This will be the Certificate Authority (CA.)  The CA should be run by a non privileged user on a server that is either not directly connected to the network, or is heavily protected.  The actual privilege of signing should also be restricted to a small team of people with a job role title that allows for this type of provisioning.  For our example, we will assume it is network isolated.

We are assuming the CA is already set up, but here are the steps that should have been taken to do so.  Create the non privileged user (and group) for signing.  Switch to that user and create the CA signing directory structure(s.)  Use ssh-keygen to create the certificate signing key(s.)

There are two types of certificates that can be signed.  The user certificate authenticates users to servers.  The host certificate authenticates hosts to users.  Why do we need both?

A host certificate gives us the ability to stand up a new server in our environment, sign its host keys with the certificate authority, and then the client knows that the new key is okay without prompting the user to trust the key first.  This reduces some of the issues with managing the known_hosts file.

A user certificate gives us the ability to tell the server that our key is okay without having to place the key on the server first.  This removes some of the issues with managing key distribution.

A signed user certificate can place restrictions on the signed public key, including all of the restrictions we discussed with the pre-amble section to the authorized_keys entries.

Let’s look at the broad overview work flow for today.  Next week, we will cover the commands needed to stand up that certificate authority structure listed above, plus the commands to sign both host and user certificates.

Work flow scenario: a new machine is built.  The host keys are regenerated (if for example this is a cloned virtual machine) and signed by the Certificate Authority.  This signed certificate is placed back onto the new machine, and that’s all that is needed, as long as the clients are configured correctly.  For the client to take advantage of this, the client needs a special known_hosts entry that begins with @cert-authority and is followed by the public key for the signed host certificates.  When the user goes to log into the new machine, the connection flow will include the server presenting a host certificate to the client, who then checks that the known_hosts “@cert-authority” entry can decipher the host certificate, and the connection is then accepted on success.  This helps prevent confusion on intentionally newly built systems when IP or hostnames change regularly.

Work flow scenario: a new user needs access to a system.  The user generates their key, sends the public key to be signed, and when the certificate is received, places it in their .ssh directory with the rest of the key related files.  The host machines have already been configured to trust the certificate authority in the sshd_config file.  When the user goes to connect with ssh, the client presents the signed certificate to the target machine.  The target machine’s sshd opens the TrustedUserCAKeys entry to open the appropriate public key to decode the certificate.  If this is successfully decoded, the connection is trusted as if the key were in authorized_keys for that user.  This helps reduce the heavy work load of managing multiple authorized_keys files per user.

Of course, there is more to it than this, but we’ll go into the finer details over the next few weeks.  Next week will be an explanation of the commands needed to set up the CA, (including revocation lists, and why they are important.)

Thanks for reading!