Every Wednesday (Hump Day) I intend to cover some topic related to hacking, penetration testing, making things do things they maybe weren’t meant to do in general, and so on. Eventually, Mondays will be more like what I envision “Blue Team” mindset should be, and Wednesdays will be more on what I envision “Red Team” mindset should look like. Since I’ve never had the opportunity to be on either kind of team at the place I’ve worked, I won’t say “this is how it is.” So if I use “Red Team/Blue Team” labels, understand this is from my perspective of how I understand them to be, from the outside looking in. I’ve mostly been in a Blue Team type of position (systems administration) but I’ve always tried to look at how to make things work in ways they maybe weren’t meant to work. This has helped me to be sure the stuff I run is run more securely. Any time I come up with a way to bypass, break, or otherwise torture a configuration, I look for ways to plug that hole.
Anyway, on to today’s topic. I’m a fan of Hak5 and the tools they create. Some people take a negative attitude toward them, but I think they’ve helped create some really nice tools for not only aggressive mentalities, but also for defensive ones.
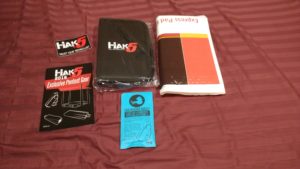
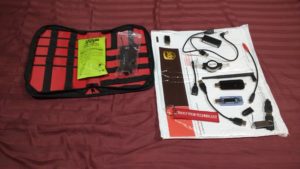
Recently they held a sale in their Hak5 shop in celebration of one of their tools being shown on the show Mr. Robot. The tool in question is the USB Rubber Ducky. I bought one of these last year, and it has been useful from a SysAdmin perspective, so I thought I’d present it as my first topic. I bought one of their zippered kits during the sale, and it should be here by the time the next one of these posts goes live, so I might be covering other items from the kit at that point. I haven’t decided yet. The Ducky is available at the Hak5 shop, at this link:
USB Rubber Ducky Deluxe
So… the USB Rubber Ducky is a device that by default with stock firmware provided by the good folks at Hak5 simply emulates a USB keyboard device when you plug it in. It comes in a case with a swivel key chain piece, and you can take this apart to get to the Ducky internals. You need to do this, to do anything useful with it. The reason is simply this: the device has a microSD card that it reads a payload file from for the purposes of knowing what to “type.” The stock payload isn’t useful for anything more than amusement. You will need to be able to access this microSD card inside to put a useful payload on it. The default firmware doesn’t present a USB storage device for accessing the card, so you will have to take it apart to get that card out.
Take the swivel off, then use a large paperclip or a jewelers/glasses screwdriver to pop the two plastic pieces of the casing apart. There is a hole in the back opposite the USB connector. Just stick it in, give it a light twist, and it should come apart. The microSD card is sometimes stuck pretty good, so you may want a tool to catch the lip of the drive to get leverage for popping it out. It’s not glued in, I promise. The one that came with my first Ducky was 128 meg, so it’s not really useful for much more than keeping a payload on. The Ducky also came with a very small microSD card reader so that you can move your card to it and not have to buy a reader separately to get your payload onto the device. It’s formatted as vFAT, but I’m not sure if it can read the payload from an NTFS formatted card. I intend to test this.
There are alternative firmwares available. The only other one(s) I’ve tried are the Composite ones available as of the time of this writing, and upon initial testing, both seemed to behave identically as far as I could tell. The Composite firmware(s) present the Ducky as both a HID (keyboard) and a USB storage device. There used to be a version that would automatically launch the payload after a set amount of time, but the ones I tested seemed to have that functionality stripped. The version that has “4Cap” in the name lets you hit Caps Lock four times in a row to trigger the payload launch.
I tried the Composite firmware that had “Cap” in the name, expecting the payload to launch. I was disappointed. The only method that worked was actually pushing the button on the Ducky device itself to launch the payload.
I hopped onto the forums to ask about this, and after a few responses from forum members “winter_soldier” and “bored369” I was able to determine that the 4Cap hex file does indeed work as expected… on a Windows workstation. Another hearty “thanks” to winter_soldier and bored369 for the helpful responses on the forums. All of my testing had been done from Linux Mint, and only a press of the button on the Ducky would send the payload, there. I’ll research what the differences are to see if there’s a reason for this difference in behavior. The Mint laptop is a Lenovo ThinkPad W520, and the Windows laptop is a Lenovo Z50. I also noticed that if I do the caps lock key sequence to trigger this on Windows, it works the first time, but then starts flashing red on a second attempt without pulling it and plugging it back in. I can send the payload multiple times from one plug in if I use the button on the Ducky, instead. The button on the Ducky stops working if you use caps sequence to send the payload and it causes the flashing red light. I suspect this may be an error in the logic loop for handling the two different cases. Maybe the source is available for review. I’ll go looking to see if I can find it.
I also intend to try a case mod by drilling two holes into one side of the case. If I put a rod down in the hole to press the button, I won’t need to take the case apart, and if I use a small snip of strand from a novelty toy like the “glowing Christmas trees” you sometimes see on sale during the holidays, I can have a fiber to run down to the indicator light so I can see if it’s working (green) or if something went wrong (red) also without taking it apart.
So besides the actual USB Rubber Ducky, you also need to have a workstation to compile your payloads on, and update the firmware if needed. There are lots of examples of this on the Forums for Windows workstations, but I do my work from a Linux Mint workstation. I grabbed the encoder.jar from:
https://github.com/hak5darren/USB-Rubber-Ducky/tree/master/Encoder
This encoder lets you specify a keyboard layout along with the Ducky Script file. Speaking of the Ducky Script file, you need to write your payload in Ducky Script, then use the encoder to compile it into a binary file that the Ducky reads upon start up. The specific file name should be “inject.bin” for the Ducky to read it. The version of java used to call the encoder should be 7 or higher.
An example test Ducky Script might look like this:
DELAY 1000
STRING #this is a test of my first payload
ENTER
The “DELAY” is in milliseconds, so 1000 is “1 second.” You want a delay of 3 seconds or more with the stock firmware, most likely. Since I already had my Composite firmware in place, and it doesn’t launch until I push the button on the Ducky, I lowered my DELAY.
The “STRING” is the actual typed text that will get sent by the Ducky upon payload execution. Since the return key is a special key, the ENTER directive is needed to emulate that keypress. There are other meta keys that can be emulated. Review the documentation for what all are available, and visit the Forums if you’re having trouble with any of them. I seem to recall seeing a reported known bug about GUI vs. WINDOWS there a while back.
To encode a Ducky Script named “test.ducky” run the following:
java -jar encoder.jar -i ./test.duck -o inject.bin -l us
After you have your payload, copy it to the microSD card, slap the card back into the Ducky, and the next time you plug it in, it should type whatever you told it to type in your script.
If you are bold enough to try out one of the alternative firmwares, visit the Wiki page below for instructions. I used the dfu-programmer software provided as a link from that site from my Mint workstation, and my instructions for getting it compiled will follow.
https://github.com/hak5darren/USB-Rubber-Ducky/wiki/Flashing-ducky
I had to install two development libraries first, since configure complained about them being missing:
sudo apt-get install libusb-dev libusb-1.0.0-dev
I still had problems compiling after this, so a little digging around on the internet using the might of my Google-FU, I came across instructions for “fixing” some broken code.
After installing the missing libraries, unpack the tarball:
tar xvfz ./dfu-programmer-0.5.4.tar.gz
cd dfu-programmer-0.5.4
Modify the configure.ac file to change all references of “LDFLAGS” to “LIBS” instead:
sed -i.bak -e ‘s/LDFLAGS/LIBS/g’ ./configure.ac
Run configure:
./configure
Before running make, modify the Makefile in the src directory to move the -lusb flags from LDFLAGS down to LIBS instead. If this sed statement is confusing, ask in the comments and I’ll explain all the pieces, but today’s topic is the Ducky, not “sed.”
sed -i.bak -ne ‘/^LDFLAGS =/{h;s/LDFLAGS = \(.*\)/LIBS = \1/;x;s/LDFLAGS =.*/LDFLAGS =/};/^LIBS = .*/{x;};p’
Now that you’ve “fixed” the problem children, run “make” per normal, and you should have a file “dfu-programmer” in your src directory.
You can grab one of the .hex firmware files from the github wiki links above, and use the following steps to update it.
Take the Ducky out of its case if you haven’t already (or if you haven’t modified the case as I described earlier.)
In order to put the Ducky into “DFU” mode, hold the button down, then insert it into the USB port. If you aren’t holding it down while you insert it, it’ll be in payload mode and will try to type the payload script. Wait a few moments for the Ducky to be recognized by the system, then use the dfu-programmer software to update the firmware as below:
This step isn’t necessary, but the wiki mentions it, so if you want to make a backup of the existing firmware, do this:
sudo ./dfu-programmer at32uc3b1256 dump >dump.bin
Before flashing a new firmware hex file to the Ducky, you need to erase it:
sudo ./dfu-programmer at32uc3b1256 erase
To drop your new firmware in place, use the “flash” command as shown below. I tried both versions of the Composite firmware, so both of these are shown, but you only run it against ONE .hex file. Pick your firmware and flash only that.
sudo ./dfu-programmer at32uc3b1256 flash –suppress-bootloader-mem Composite_Duck_S003.hex
sudo ./dfu-programmer at32uc3b1256 flash –suppress-bootloader-mem Composite_Duck_4cap.hex
Finally, you have to remember to reset the Ducky after a firmware update in order to make it run payloads again.
sudo ./dfu-programmer at32uc3b1256 reset
That’s it. After the firmware is updated, you should be able to remove the Ducky and reinsert it to test functionality. Remember that if you used a firmware like the Composite versions above that requires a push of the Ducky button, you won’t see the payload until you push the button. I recommend using a test payload that doesn’t press a bunch of meta keys, first. Open a text editor, then insert the Ducky. Press the button if needed, but watch that the payload actually gets sent to the text document to verify it is functioning properly.
Hak5 touts this as a device for social engineering by virtue of curiosity. Put your malicious payload on the Ducky, then drop it in a parking lot and wait. Your payload might call up a bunch of commands to offload a Windows password dump to a remote web server, for example. So how does this tool have any kind of legitimate use in a SysAdmin tool kit?
The answer is simple. There are two scenarios where I have personally already found this tool useful from an everyday SysAdmin perspective. The first is when dealing with a console session to a remote server, and the console does not allow copy/paste. When you are dealing with a blind console that doesn’t allow pasting commands into the terminal, you have to be meticulous in your typing. If you know all of the steps you need to get the task accomplished, you can carefully craft that out into a Ducky Script, compile it, and then make that console your focused window before plugging the Ducky in for your “I’m pasting my commands anyway, so take that!” workload.
The other scenario has to do with a long ssh private key passphrase that needed to be stored into an IAM solution, and people were present who should not see this passphrase. Instead of having to start over multiple times, because the laws of nature demand that I mistype the phrase at least four times before getting it right, I was able to put the passphrase into a Ducky Script, take the Ducky to the conference room where the IAM software was being configured, set the focus on the passphrase field in the software, then plug the Ducky in. Or at least, I would have if I’d had the Ducky with me that day. Instead I had to type it out. Multiple times. Because things. Since that was the “development” environment, I’ll be doing the “production” environment with the Ducky next time.
Thanks for reading this, and if you have any ideas on other legitimate uses of the USB Rubber Ducky as an every day SysAdmin tool, share in the comments!