Today, we’ll take a look at the Raspberry Pi. The Raspberry Pi is currently at “Pi 3” but our lab has a Pi 2 model B, which is what we will cover.
The original plan for the Pi was to create a very small and portable attack device, using Kali linux as the OS installation. I mused over what to do about a screen, when I came across another blog post that covered how to set this up with one of the little screens sold by AdaFruit.
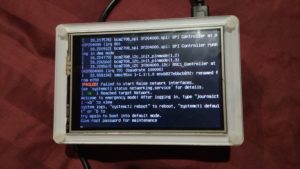
Re4son’s blog post gave some initial instructions that I tried to follow, but they didn’t work for me at first. I bought the smaller 2.8″ screen on accident, and the menu size didn’t match. I tried mucking with those settings, but there were SO many menus that needed adjusting, that it just wasn’t worth my time. I bought the bigger 3.5″ screen and tried again. I had a little more success, but the last time I rolled with this, I had issues with the Greenbone setup for Open-VAS. I think it was probably an issue with the version of Kali I was at at the time. I shelved this project, and haven’t picked it back up. I will probably give it a go again, because his blog post has evolved even more since I last followed it.
Now that I have the Nexus 10 with Nethunter on it, this specific project will be a lower priority for a while, though. My use for this until then will focus on using this as one of the target machines, either for configuration management examples, or as an actual vulnerable machine (with configuration issues being the primary vulnerabilities.)
The Pi 2 has a quad core 900Mhz ARM Cortex-7 processor from Broadcom. It includes 1 Gig of RAM, 4 USB 2.0 connectors, an HDMI port, and a 10/100 RJ45 Ethernet socket.
All of the extra USB ports means that this can take several peripherals, including wireless adapter and keyboard. The Pi 3 includes a built in wireless adapter, but the Pi 2 does not. If you are getting a Pi for your lab, it is probably best to pick up whatever the latest model is, ignoring my setup. The Pi 3 came out a few weeks after my last attempt at the Re4son project. The frustration over the poor timing of its release, after dropping money on all new case, screen, and so on is one reason I haven’t touched it in a while.
Once again, if you want to follow along in building a lab similar to mine, here are the components.
The Pi 2 Board I recommend getting whatever is newest, though.
USB to TTL Serial Cable – Debug / Console Cable for Raspberry Pi Just like with the BeagleBone Black, you will probably want to be able to hit the “console” sometimes. This cable is needed for that. Note that the voltage on this is different from the one for the BeagleBone Black. Don’t use the wrong cable with either board.
The Case This case is really nice even when not used with one of the screens. It’s fairly sturdy, and fits around the components snugly. If you are not getting a display, there are other cases that are just as nice, and don’t cost as much. Shop around.
The 3.5″ TFT Display Unless you are planning on doing a specific project that includes such a tiny screen, I recommend holding out for a larger one, instead. Something like this might be better, but it’s pricey.
Samsung EVO 32GB Class 10 Micro SDHC Card These came on sale for ridiculously low prices a few times, so we got them in sets of three or more. Class 10 cards are highly recommended for use with these small Single Board Computing devices.