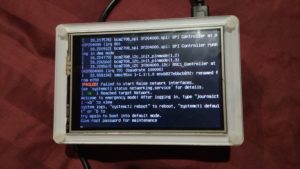
Last week we talked about the kit, how it went together, and the fact that the first boot was to the pi-top polarisOS microSD card included with the kit. Today, I’ll go over a quick rambling of notes on how the second “First Boot” (after it charged) went, and what I poked around looking for in this OS. This post will not include screenshots, but I may try to get a few and do a follow up later in the week that is screenshot heavy.
It is a graphical boot that brings up a LightDM Panel (auto log-in.) This initial Panel is the “pi-topDASHBOARD” and contains the following three sections:
- Learn. Play. Create
(includes "pi-topCODER" launch and "CEEDuniverse" play buttons) - Quick Launch
(includes application icons for common/popular applications.) - Notes
(a notepad that can be typed into.)
Along the top of the Panel is a status bar that includes indicators for whether the network is working, battery status, date/time, and a selector for Settings.
Selecting any app from the Quick Launch (or pressing the “Panel” keyboard button) will make this initial panel go away, and present the typical X11 style desktop.
Pressing the “Panel” keyboard button will bring the panel view back.
Since the Battery Status only shows on the Panel bar, this is a good thing to have.
From the typical X11 style desktop view, there are a few apps pinned to the bottom task bar.
- Chromium
- File Manager (PCManFM)
- LXTerminal
- CEED Universe
- 3D Slash
- Mathematica
- Wolfram
The far right of the status bar includes status icons for the network, volume, and time, as well as an “eject” icon for external media, and a “panel” icon that can be clicked instead of hitting the Panel button on the keyboard.
The primary menu icon is in the lower left corner and the menu includes categories for:
- Programming
- BlueJ Java IDE
- Geany
- Greenfoot Java IDE
- Mathematica
- Node-RED
- Python 2 (IDLE) (Bundled with Python 2)
- Python 3 (IDLE) (Bundled with Python 3)
- Scratch
- Scratch 2
- Sense HAT Emulator
- Sonic Pi
- Thonny Python IDE
- Wolfram
- Office
- Libre Office (Base, Calc, Draw, Impress, Math, Writer)
- Internet
- Games
- CEED Universe
- Minecraft Pi
- Python Games
- flippy (A game like reversi)
- fourinarow (Get four in a row)
- gemgem (A tile matching puzzle)
- inkspill (Flood the screen with pixels)
- memorypuzzle (Test your memory)
- pentomino (5 block Tetris)
- simulate (Repeat the pattern)
- slidepuzzle (Traditional slide puzzle)
- squirrel (Eat the smaller squirrels)
- starpusher (Sokoban)
- tetromino (Tetris-like game)
- tetrominoforidiots (Tetris for Idiots)
- wormy (Snake-like game)
- website
- Accessories
- 3D Slash
- Archiver
- Calculator
- File Manager
- Image Viewer
- PDF Viewer
- SD Card Copier
- Task Manager
- Terminal
- Text Editor
- Education
- System Tools
Out of the packages listed above, htop is a “top” replacement that has some enhanced features, CEED Universe is part of the pi-top “CEED” learning software, with online games and such, and the rest are pretty self explanatory (integrated development environments, programming languages, some games, web and email, and an office suite.)
The items of greatest interest to me from poking around with the intent of setting up Kali as the primary OS for this machine are the hardware related packages. I want a battery status indicator, as well as power/terminal launch/panel control buttons to function from the keyboard. In order to take advantage of these things, I took a look at the software repository settings, and found this:
/etc/apt/sources.list:
deb http://mirrordirector.raspbian.org/raspbian/ jessie main contrib non-free rpi

# Uncomment line below then 'apt-get update' to enable 'apt-get source'

#deb-src http://archive.raspbian.org/raspbian/ jessie main contrib non-free rpi
/etc/apt/sources.list.d/pi-top.list:
deb http://apt.pi-top.com/raspbian/ jessie main
/etc/apt/sources.list.d/raspbian.list:
deb http://archive.raspberrypi.org/debian/ jessie main ui

# Uncomment line below then 'apt-get update' to enable 'apt-get source'

#deb-src http://archive.raspberrypi.org/debian/ jessie main ui
All of the packages specifically for the pi-top hardware include a “pt-” prefix. Using a mix of dpkg -S, dpkg -L, and apt-cache showpkg I was able to confirm that the pt-* packages are located at the raspbian repositories jessie main. This should make it easy to install them for Kali to take advantage of the special keyboard keys, and maybe get a battery status indicator.
